nodejs
Object
본이qq
2022. 9. 6. 09:01
// 1. 자바 스크립트의 객체 생성
// { } 중괄호안에 key(요소의 이름) 와 value(요소의 값)이 ':'(콜론) 으로 구분되어서 존재하는 값들의 집합
const product = { name:'냉장고' , 제조사:'대한민국' };// 변수하나 안에 한개이상의 키와 값이 조합되어 데이터를 넣어 사용합니다
const obj = {};// 멤버가 없어도 자료형은 객체로 인식됩니다
// 객체안에 있는 키와 값의 조합 하나를 속성이라고 하며, 각 속성은 콤마(,)로 구분합니다
// 객체내의 키를 이용한 값의 출력
console.log(product['제조사']);
console.log(product.name);
// 자바스크립트의 객체는 별도의 클래스 선언 없이, { }중괄호 안에 직접 속성들을 넣는 순간 객체(Object)로 인식되어 사용되어 집니다.
// 2. 객체의 속성과 메서드
// - 속성:객체 내부에 있는 하나하나의 값.
// - 객체의 속성이 가질 수 있는 자료형.
var object = {
	useNumber:273,
	useString:'문자열',
	useBoolean:true,
	useArray:[52, 385, 103, 58],
	// 메서드:객체의 속성 중 함수 자료형인 속성.
	method:function(){
        console.log('멤버 함수를 실행합니다');
    } // 멤버메서드라고 표현하지만,  함수를 저장할 수 있는 변수에 익명함수를 저장한것과 같습니다
};
console.log( object.useNumber ); //console.log( object['useNumber'] );
console.log( object.useString );
console.log( object.useBoolean );
console.log( object.useArray );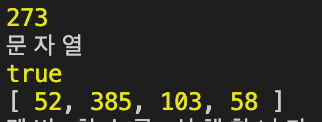
object.method();   // 함수의 이름에 괄호를 붙여서 함수의 내용을 실행합니다
console.log(object.method);
console.log(object.method());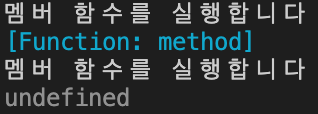
// 함수의 내부에 있는 console.log('멤버 함수를 실행합니다');실행->'멤버함수를 실행합니다' 출력
// console.log(object.method()); 의 console.log() 는 undefined 출력
// 멤버함수에 매개변수가 존재할수 있습니다.
var person = {
    name:'홍길동',
    eat:function(food){
        console.log('음식: '+food);
    }
};
console.log(person.name);
person.eat('스파게티');
// 멤버 함수가 멤버변수로의 접근
// - this 키워드 : 자바스크립트는 멤버변수에 접근을 위해서 반드시 this 키워드를 써야 합니다
var person = {
    name:'홍길동',
    eat:function(food){
        //console.log( this.name + '이/가 ' + food + '을/를 먹었습니다.');
        console.log( `'${this.name}'이/가 '${food}'을/를 먹었습니다.`);
    }
};
person.eat('김밥');
// 3. 객체와 반복문
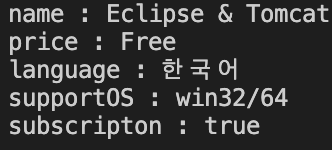
const product1 = {
	name:'Eclipse & Tomcat',
	price:'Free',
	language: '한국어',
	supportOS:'win32/64',
	subscripton:true
};
// 객체 이름을 반복문에 대입하여 각 멤버 변수들의 값에 접근합니다
for(var key in product1){
    let output = `${key} : ${product1[key]}`;
    console.log(output);
}
// 4. 객체와 관련된 키워드
// - in 키워드: 해당 키가 객체 안에 있는지 확인
const student = {
	이름:'홍길동',
	국어:92, 수학:98, 영어:96, 과학:98
};
let output = '';
output += "'이름' in student: "+ ('이름' in student)+'\n';
output += "'성별' in student: "+ ('성별' in student);
console.log(output);
// - with 키워드: 복잡하게 사용해야 하는 코드를 짧게 줄여 주는 키워드.
// . with 키워드를 사용하지 않은 경우
var write = '';
write += '이름 : ' + student.이름 + '\n';
write += '국어 : ' + student.국어 + '\n';
write += '수학 : ' + student.수학 + '\n';
write += '영어 : ' + student.영어 + '\n';
write += '과학 : ' + student.과학 + '\n';
console.log(write);
// . with 키워드를 사용한 경우
var write = '';
with(student){
    write += '이름 : ' + 이름 + '\n';
    write += '국어 : ' + 국어 + '\n';
    write += '수학 : ' + 수학 + '\n';
    write += '영어 : ' + 영어 + '\n';
    write += '과학 : ' + 과학 + '\n';
}
console.log(write);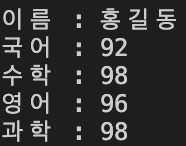
// 5. 객체의 속성 추가와 제거
// - 동적 속성 추가/제거 : 처음 객체 생성하는 시점 이후에 객체의 속성을 추가하거나 제거할 수 있습니다
// 빈 객체를 생성
const student1 = {};// 객체 생성이후 동적으로 속성(멤버변수)를 추가 할 수 있습니다
student1.이름 = '홍길동';
student1.취미 = '악기';
student1.특기 = '프로그래밍';
student1.장래희망 = '훌륭한 프로그래머';
for(var key in student1){
    console.log(`${key} : ${student1[key]}`);
}
// 메서드 추가
student1.toString = function(){
    for(var key in this){
        if(key != 'toString'){   // 자기 자신(toString)을 제외한 멤버들을 출력
            console.log(`${key} : ${student1[key]}`);
        }
    }
}
student1.toString();
// 객체의 속성 제거
delete(student1.장래희망);
student1.toString();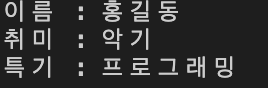
// 6. 생성자 함수 : new 키워드를 사용해 객체를 생성할 수 있는 함수.
// - 생성자 함수를 사용한 객체의 생성과 출력. 그냥 함수를 사용해 객체를 리턴하는 방법과 차이가 없어 보임.
var student2 = { 이름:'홍길동'};
var student3 = { 이름:'홍길동', 성별:"남"};
var student4 = { 이름:'홍길동', 성별:"남", 나이:20 };
// 위 세개의 객체는 모두 형태가 다른 객체입니다
// 함수안에 this 를 이용한 변수에 값을 넣으면 그 이름의 멤버 변수가 만들어지고, 최종 그 변수들을 멤버로하는 객체가 만들어지는 생성자 함수로 인식됩니다
function Student(name, korean, math, english, science){
    // 속성
    this.name = name;
    this.kor = korean;
    this.math = math;
    this.english = english;
    this.science = science;
    this.getSum = function(){
        return this.kor + this.math + this.english + this.science;
    }// 메서드
    this.getAvg = function(){
        return this.getSum() / 4;
    }
    this.toString = function(){
        return '이름 : ' + this.name + ',   총점 : ' + this.getSum() + ',   평균 : ' + this.getAvg();
    }
}
// 객체가 만들어지기 위한 생성자 함수
var std1 = new Student('홍길동', 88,78,98,87);
var std2 = new Student('홍길남', 77,65,89,65);
var std3 = new Student('홍길서', 99,74,95,78);
console.log( std1.toString() );
console.log( std2.toString() );
console.log( std3.toString() );
// 7. 프로토타입
// - 생성자 함수를 사용해 생성된 객체가 공통으로 가지는 공간.
// - 자바스크립트의 모든 생성자 함수는 내부의 this 변수들의 prototype을 갖습니다.
// 그리고 prototype은 객체입니다.
function Student(name, korean, math, english, science){
	// 속성
	this.name = name;
	this.kor = korean;
	this.math = math;
	this.english = english;
	this.science = science;
    // prototype={this.name:name , this.kor:korean , this.math:math , this.english : english, this.science:science}
}
// 생성자 함수가 만들어지고 그안에 this를 이용한 멤버변수가 정의되고, 초기화되면,
// 그 함수로 만들어질 객체를 위한 프로토타입이라고 하는 객체가 생성됩니다.
// 이 생성자로 객체를 만들면, prototype 이 복사되면서 새 객체가 만들어집니다
// 프로토타입은 생성될 객체의 원본이며, 프로토타입 또한 객체형태로 존재합니다.
// const std4 = new Student('홍길서',87,98,87,45);
// 위명령이 실행되는 순간 프로토타입의 사본이 std4에 저장되면서 새로운객체를 이룹니다
// 만약 생성자함수에 추가로 멤버변수 또는 멤버메서드를 추가하려고 한다면,
Student.prototype.basicLanguage = 100;
Student.prototype.getSum = function(){
    return this.kor + this.math + this.english + this.science + this.basicLanguage;
}
Student.prototype.getAvg = function(){
    return this.getSum() / 5;
}
Student.prototype.toString = function(){
    return `성명 : ${this.name} 총점:${this.getSum()}  평균:${this.getAvg()}`;
}
const std5 = new Student('홍길남', 98,78,58,69);
console.log( std5.toString() );
Student.prototype.basicLanguage = 80;
const std6 = new Student('홍길북', 98,78,58,69);
console.log( std6.toString() );// 새로 추가된 멤버변수 basicLanguage 변수의 값을 전달인수로 전달해서 초기화할수는 없습니다
// basicLanguage 의 값은 Student.prototype.basicLanguage = 를 통해서만 변경 가능합니다
// 프로토타입은 생성자 안에서 새로만들어지는 객체에 복사되기 위해 준비되고 있는 공간입니다
// 그안에 새로만들어질 객체의 모습을 갖춘 객체입니다.
// 생성자에 멤버변수와 멤버메서드를 추가하려면 반드시 이 프로토타입을 이용하세요~
// 객체를 생성후에 멤버메서드를 추가하느냐, 프로토타입에 메서드추가후 객체를 만드느냐는
// 선택적으로 사용할수 있습니다
var std1 = new Student('홍길동', 88,99,77,66);
std1.toString = function(){   }
// (1). 객체 먼저 만들고, 그 객체에 toString 멤버 메서드 추가
// 결과 : 현재 객체에만 toString 추가
Student.prototype.toString = function(){  }
var std1 = new Student('홍길동', 88,99,77,66);
// (2). 생성자에 toString 추가하고 객체 생성
// 결과 : 앞으로 Student 생성자를 이용해서 만들어지는 모든 객체에 toString 추가
// 9. 상속
function Rectangle(w, h){
    var width = w;
    var height = h;
    this.getWidth = function() {return width;}
    this.getHeight = function () {return height;}
    this.setWidth = function(value){ width = value; }
    this.setHeight = function(value){ height = value; }
}
Rectangle.prototype.getArea = function () {
    return this.getWidth() * this.getHeight();
}
var rectangle = new Rectangle(5, 7);
rectangle.setWidth(8);
console.log('AREA: ' + rectangle.getArea() );
console.log('\n');
function Square(length){
    this.base = Rectangle;
    // 전달된 length  값을 base 생성자의 w, h 에 같은 값으로 전달
    this.base(length, length);
}
// Retangle 생성자를 상속
Square.prototype = Rectangle.prototype;// 추가로 프로토타입도 복사힙니다
// 부모 생성자로 객체 생성
var rectangle = new Rectangle(5, 7);
// 자식 생성자로 객체 생성
var square = new Square(5);
// 상속받은 메서드 실행
console.log('rectangle AREA: ' + rectangle.getArea());
console.log('square AREA: ' + square.getArea());
console.log('\n');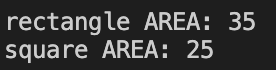
10. Object 객체
// - toString() 메서드.
// - 객체를 문자열로 변환할 때 자동으로 호출.
var obj1 = new Object();
console.log(obj1);  // {}
console.log(obj1.toString());  // [object Object]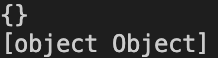
// - toString() 메서드 재정의
var std = {
    name:'홍길동',
    grade:'고등학교 1학년',
    toString:function(){    return this.name+':'+this.grade;   }
};
console.log(std);   // Object 객체가 갖고 있는 toString 이 모든 멤버를 출력
console.log(std.toString());  // 재정의된  toString 이 함수안의 내용을 리턴 또는 실행